
Create a Custom Post Type in Wordpress with Database Content
I implemented a custom page template in Wordpress that would retrieve data from the database using Ajax.

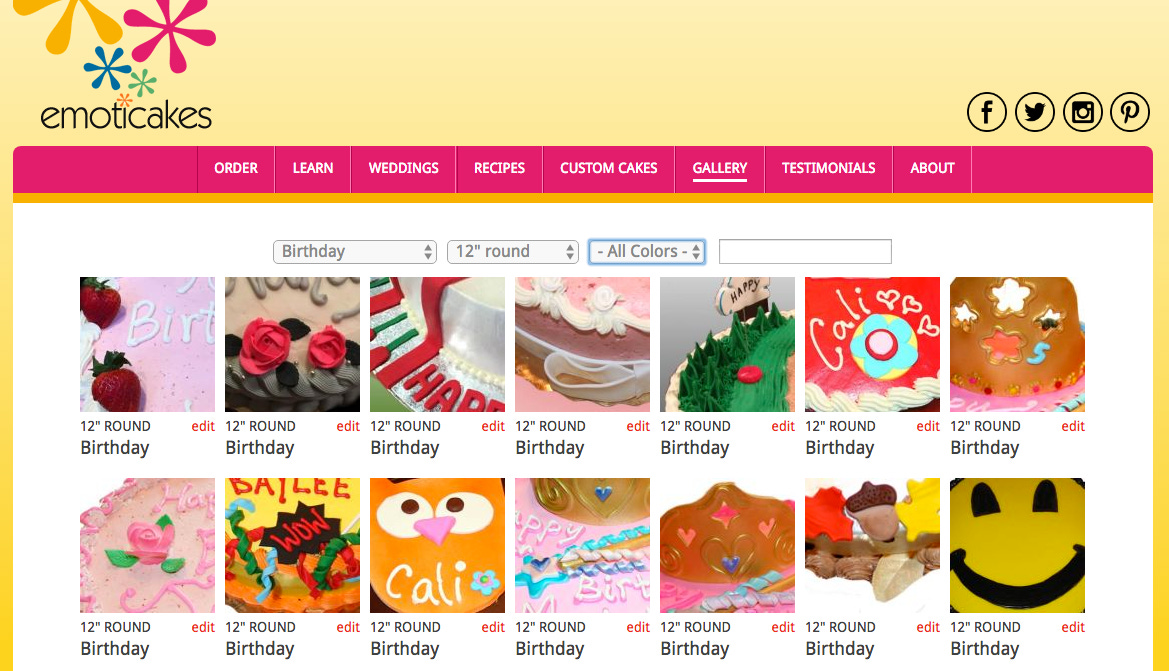
I built a custom customer management system for my wife’s Emoticakes business. Based on MySQL and PHP, it helps her manage her orders and gives her a complete picture of her customers and their orders. When we re-platformed the public-facing part of her web site to Wordpress, there were a few features that used data from her customer database. To preserve those features, I implemented a custom page template that would retrieve data from the database using Ajax. Here’s how I created the cake gallery. The gallery uses data from custom database tables I added to the Wordpress database and administer from the customer management system.
Step 1: Create a Custom Page Template in Wordpress
Create a custom template for the database-driven page in the root directory of the active theme. It doesn’t matter what the file is named, but it is important to start the file as shown in the code sample below with the template name. For further detail, read Smashing Magazine’s comprehensive step-by-step guide to creating custom page templates. Here’s what my template/gallery.php template file looks like:
| <?php | |
| /* Template Name: Gallery */ | |
| /** | |
| * The Template for displaying gallery cake images. | |
| * @package Motif | |
| */ | |
| get_header(); ?> | |
| <?php | |
| // use a nonce: a one-time token to identify future requests to the web site | |
| // echo the nonce into the form tag so it can be read on form submission | |
| // and verified on the server | |
| $nonce = wp_create_nonce("gallery_nonce"); | |
| ?> | |
| <form id="galleryForm" data-nonce="<?php echo $nonce ?>"> | |
| <?php | |
| // generate select lists | |
| global $wpdb; | |
| // occasions | |
| $occasions = $wpdb->get_results('SELECT id, occasion FROM occasions ORDER BY occasion ASC', ARRAY_N); | |
| echo "<select id='occasion' class='gallerySelector'>"; | |
| echo "<option value='all'>- All Occasions -</option>"; | |
| foreach ($occasions as $occasion) { | |
| echo "<option value='{$occasion[0]}'>{$occasion[1]}</option>"; | |
| } | |
| echo "</select>"; | |
| // ... repeat for sizes and colors | |
| <button type="submit" href="javascript:void(0)" class="updateGallery">Update</button> | |
| </form> | |
| <ul class="l-grid galleryGrid clickableImages"></ul> | |
| <?php get_footer(); ?> |
Upload this file via FTP to your theme’s root directory. In the Wordpress admin console, create a blank page to hold the gallery. When editing that new page, choose the new gallery template under page attributes. You won’t need to add any other content to the page, since everything we need is in the template.
Step 2: Server-Side Code to Query Data
In the theme’s functions.php file, I added instructions at the top to include jQuery and also a custom JavaScript file called gallery/script.js. My page issues an Ajax request to get/gallery/data, which after checking the validity of the nonce makes a query based on the Ajax request’s parameters. I’ve removed some of the code to build up the SQL since it’s not directly relevant to the purpose of this post, but you can see how you could build up a complex query based on the selections.
| <?php | |
| add_action("wp_enqueue_scripts", "my_enqueue", 11); | |
| function my_enqueue() { | |
| wp_deregister_script('jquery'); | |
| wp_register_script('jquery', "http" . ($_SERVER['SERVER_PORT'] == 443 ? "s" : "") . "://ajax.googleapis.com/ajax/libs/jquery/1.11.1/jquery.min.js", false, null); | |
| wp_enqueue_script('jquery'); | |
| wp_enqueue_script( 'function', get_stylesheet_directory_uri().'/js/gallery_script.js', 'jquery', true); | |
| } | |
| // add actions to respond to get_gallery_data | |
| add_action("wp_ajax_nopriv_get_gallery_data", "get_gallery_data"); | |
| add_action("wp_ajax_get_gallery_data", "get_gallery_data"); | |
| // define the get_gallery_data function that retrieves records from the database | |
| function get_gallery_data() { | |
| if ( !wp_verify_nonce( $_REQUEST['nonce'], "my_gallery_nonce")) { | |
| exit("No naughty business please"); | |
| } | |
| // build your SQL up using the request parameters, for example, $_REQUEST["occasion_id"] | |
| $query = "SELECT id, occasion, size FROM cakes WHERE occasion = " . $_REQUEST["occasion_id"]; | |
| // issue the query | |
| global $wpdb; | |
| $query_result = $wpdb->get_results($query, OBJECT); | |
| $result['type'] = "success"; | |
| $result['data'] = $query_result; | |
| // encode result as JSON and return it | |
| $result = json_encode($result); | |
| echo $result; | |
| die(); | |
| } | |
| ?> |
Step 3: Client-Side Code to Request and Render Data
I include all of the details needed to request and render the data on the front end in gallery_script.js. This includes making an Ajax request when the page loads and when attributes change, and rendering the results into the gallery grid.
| function renderGrid(gallery) { | |
| // helper function to loop through all gallery items and output HTML | |
| var cell = ""; | |
| for (var i = 0; i < gallery.length; i++) { | |
| cell += "<li>"; | |
| cell += " <img src='/images/" + gallery[i].id + ".jpg' />"; | |
| cell += " <b>" + gallery[i].size + "</b>" + gallery[i].occasion; | |
| cell += "</li>"; | |
| // append this cake to the gallery | |
| jQuery(".galleryGrid").append(cell); | |
| cell = ""; | |
| } | |
| // once all HTML is in the page, use jQuery to fade it in | |
| jQuery(".galleryGrid").fadeIn(); | |
| } | |
| function updateGallery() { | |
| // get the nonce from the form to pass along with the request, along with other input params | |
| var my_gallery_nonce = $("#galleryForm").attr("data-nonce"); | |
| var occasion = $("#occasion").val(); | |
| var size = $("#size").val(); | |
| var color = $("#color").val(); | |
| var query_text = $("#query_text").val(); | |
| // fade out the gallery that's already there while the request is being made | |
| jQuery(".galleryGrid").fadeOut("fast", function() { | |
| jQuery(".galleryGrid").html("").hide(); | |
| $.ajax({ | |
| type : "post", | |
| dataType : "json", | |
| url : my_ajax_script.ajaxurl, | |
| data : { action: "get_gallery_data", | |
| occasion_id : occasion, | |
| query_text: query_text, | |
| size_id: size, | |
| primary_color: color, | |
| nonce : my_gallery_nonce | |
| }, | |
| success: function(response) { | |
| if(response.type === "success") { | |
| // call render grid to parse the results | |
| renderGrid(response.data); | |
| } | |
| } | |
| }); | |
| }); | |
| } | |
| $(function() { | |
| // handle changes in gallery filters | |
| $(".gallerySelector").change(function() { | |
| updateGallery(); | |
| }); | |
| // form submit should not submit | |
| $('#galleryForm').submit(function(e) { | |
| e.preventDefault(); // to stop the form from submitting | |
| }); | |
| if ($("body").hasClass("page-template-template_gallery-php")) { | |
| // we're on the gallery page, initial click to show results | |
| updateGallery(); | |
| // click handler | |
| $(".updateGallery").click(function() { | |
| updateGallery(); | |
| }); | |
| } // end gallery page | |
| }); |
Parting Thoughts
The code above should get you started, but I did add some nice bells and whistles to the interface after I had it all working. You’ll see a custom overlay for more details about a cake, and also use of jQuery Lazy Load, a fine plug-in for a gallery like this that scrolls on for a bit. Overall, I was quite pleased with how nicely this integrated with Wordpress, and gave me a way to deploy custom database-driven content fairly seamlessly. I also used the same technique on the Emoticakes testimonials page, again pulling in custom database content.